Automatic Line Following Module (3 Channels) – DIY Robotics Part

SKU: FA3008-1-0
Sensor Type

Infrared reflective (IR LED + phototransistor)

Number of Channels

3 independent channels

Operating Voltage

3.3V – 5V DC

Output Type

Digital (HIGH/LOW) per channel

Detection Height

5 – 15mm (recommended)

Sensitivity Adjustment

Potentiometer per channel

Indication

LED per channel

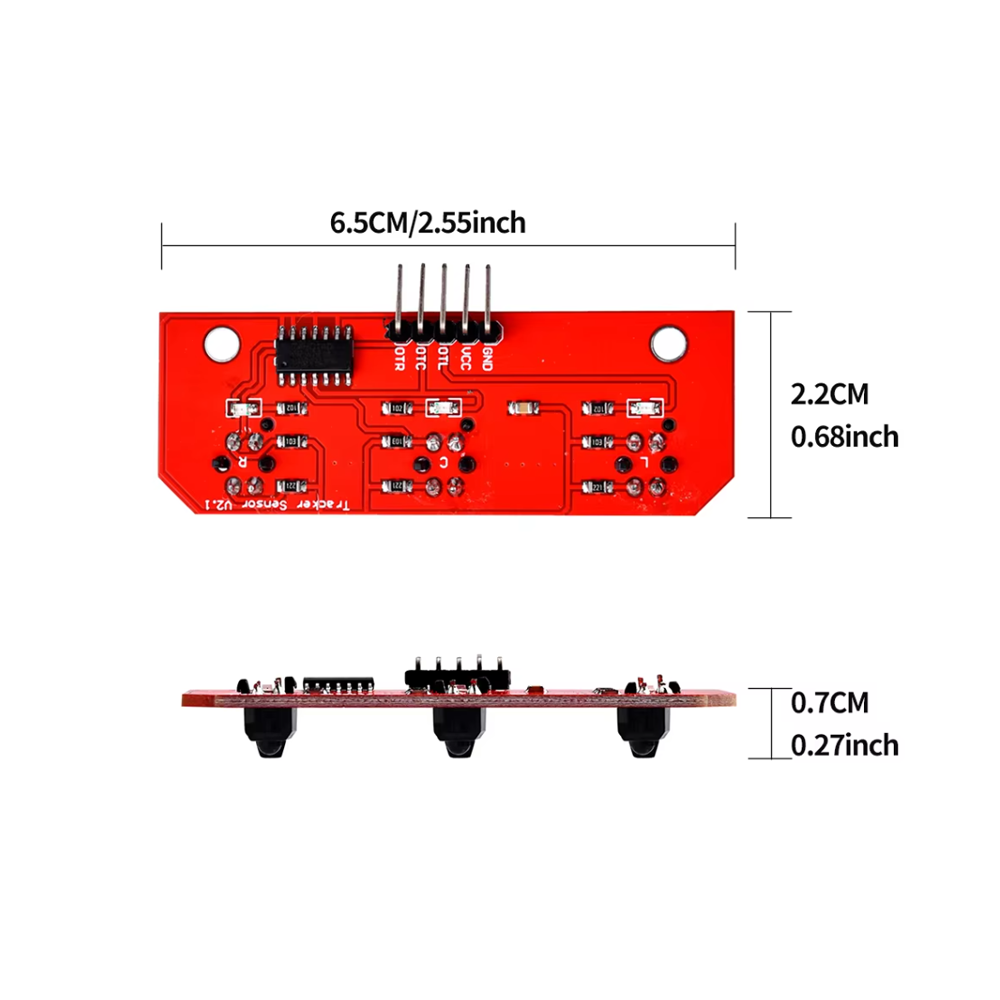
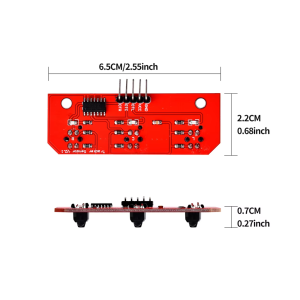
Module Dimensions

Compact PCB with mounting holes

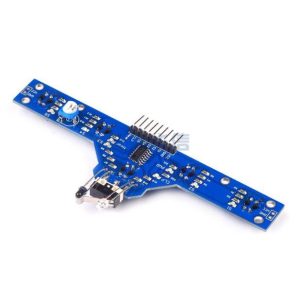
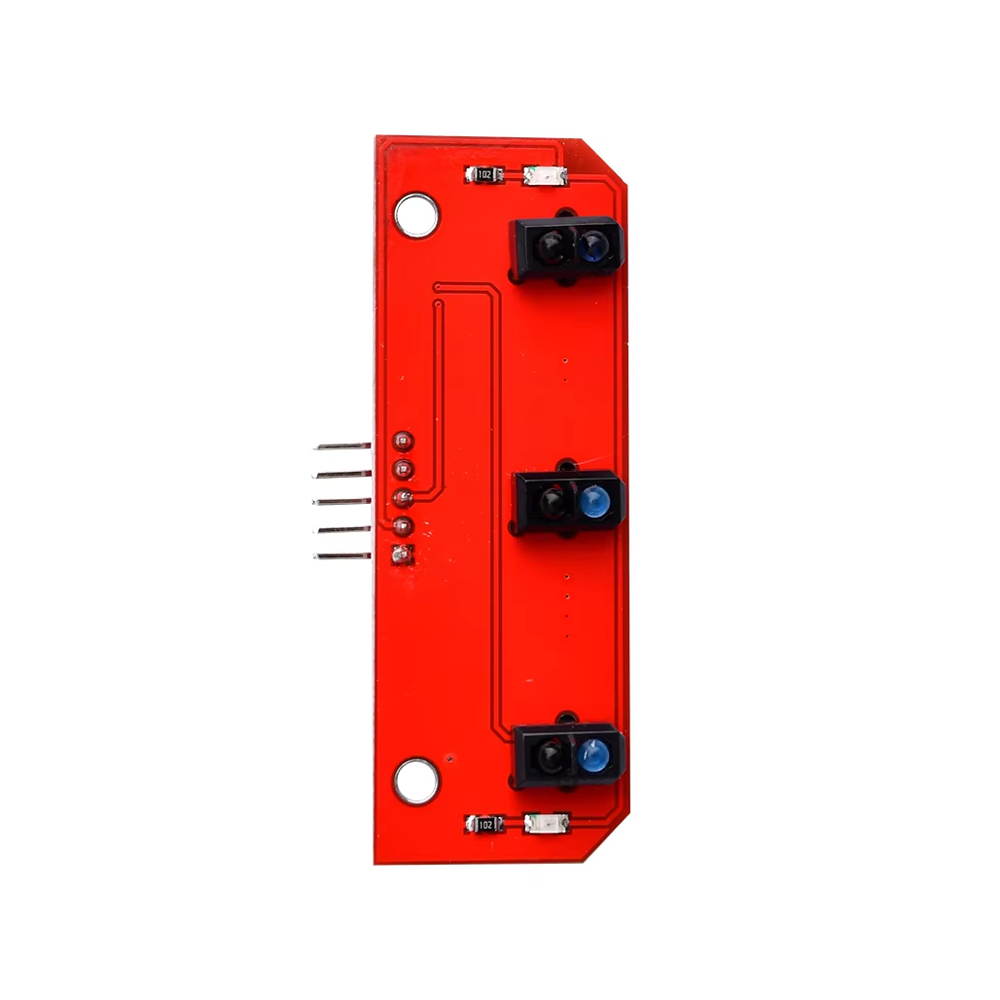
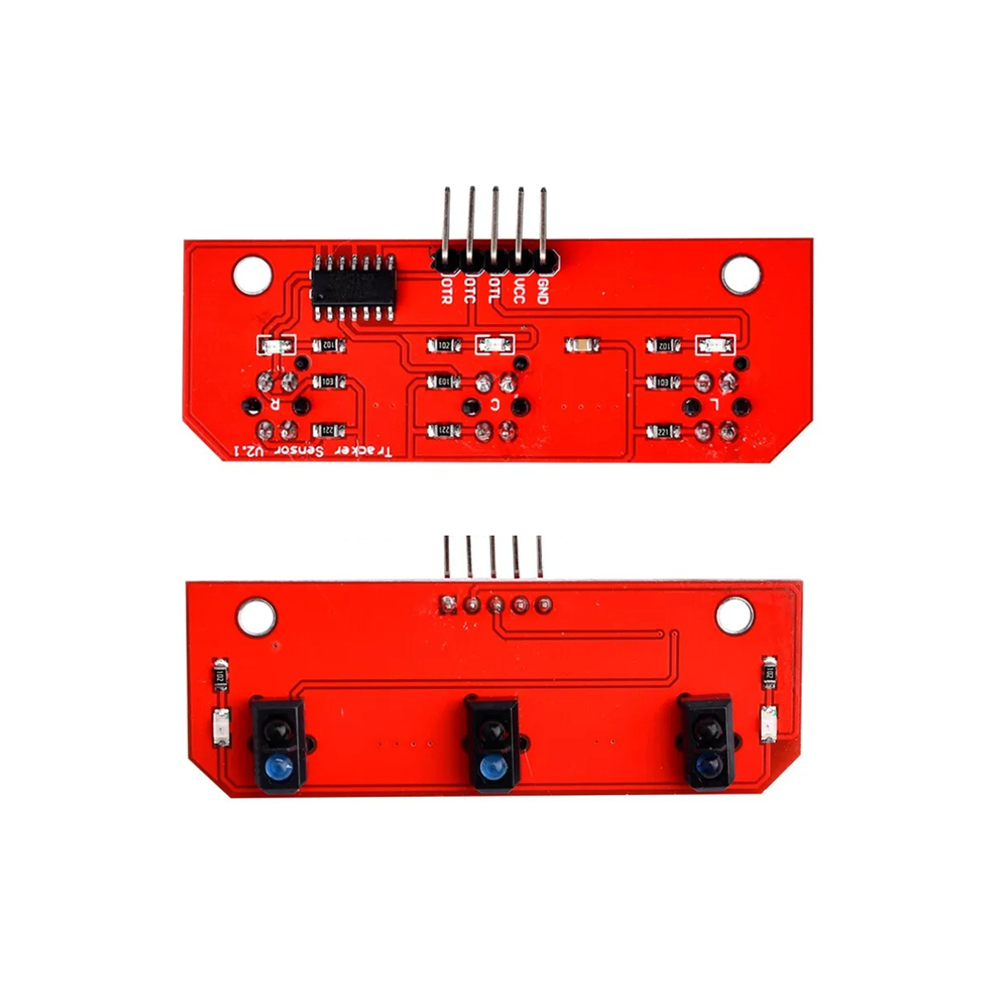
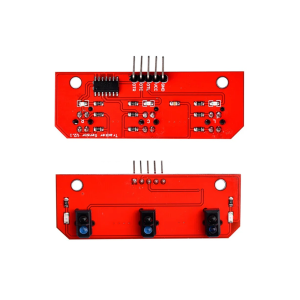
The Automatic Line Following Module (3 Channels) is a compact, ready-to-use sensor board designed for DIY robotics, line-following cars, and educational projects. It combines three independent infrared reflective sensors on a single PCB, each capable of detecting the presence or absence of a line beneath it. This makes it an ideal sensor suite for building line-following robots, automatic guided vehicles (AGVs), and edge detection systems without the need for complex wiring or calibration.

Each of the three sensor channels consists of an infrared emitter (IR LED) and an infrared receiver (phototransistor). The emitter emits infrared light downward toward the surface, and the receiver measures the reflected intensity. When the sensor is over a white surface (high reflectivity), the reflected IR is strong, and the output is typically LOW. When over a black line (low reflectivity), the reflected IR is weak, and the output is typically HIGH. This simple binary detection allows a robot to follow a black line on a white background (or vice versa).

The module features three independent digital outputs, one for each sensor channel. The outputs can be connected directly to a microcontroller’s digital input pins, enabling the robot to determine its position relative to the line and make steering decisions. The center sensor is typically used to detect the line directly ahead, while the left and right sensors detect deviation and allow the robot to correct its course.

Each channel has an onboard potentiometer for adjusting detection sensitivity, allowing the module to adapt to different surface colors, lighting conditions, and line contrasts. LED indicators show the state of each sensor in real time, making it easy to verify detection during setup and troubleshooting.

The module operates from a 3.3V to 5V DC supply, making it compatible with Arduino, ESP32, STM32, Raspberry Pi, and other microcontrollers. The compact PCB design with mounting holes allows easy integration into robot chassis and custom enclosures. The module is widely used in line-following robots, maze-solving robots, obstacle avoidance systems, educational STEM projects, and DIY robotics kits.

Important Note: The module is not waterproof and should be mounted 5–15mm above the surface for optimal detection. Detection performance can be affected by ambient infrared sources (such as sunlight or incandescent lighting) and highly reflective surfaces. For best results, use the module in controlled lighting conditions and calibrate the potentiometers for your specific surface.

Whether you are building a line-following robot, an automated guided vehicle, or a STEM educational kit, the Automatic Line Following Module (3 Channels) provides a reliable, affordable solution. It is suitable for individual makers, students, and businesses purchasing in bulk for product development or educational programs.

Features

  • Three independent IR sensor channels — Left, center, and right detection

  • Digital outputs — Each channel provides a clean HIGH/LOW signal

  • Adjustable sensitivity — Onboard potentiometer for each channel

  • LED indicators — Visual status for each sensor channel

  • Wide voltage range — 3.3V to 5V DC, compatible with Arduino, ESP32, STM32, Raspberry Pi

  • Compact PCB design — With mounting holes for easy integration

  • Simple interface — Three digital outputs for direct connection to MCU

  • Wide application range — Line-following robots, AGVs, edge detection, educational kits

  • Ready to use — No complex wiring or calibration required

  • Cost-effective — Affordable solution for line detection in volume production

Technical Specifications

# Parameter Specification
1 Sensor Type Infrared reflective (IR LED + phototransistor)
2 Number of Channels 3 independent channels
3 Operating Voltage 3.3V – 5V DC
4 Output Type Digital (HIGH/LOW) per channel
5 Detection Height 5 – 15mm (recommended)
6 Sensitivity Adjustment Potentiometer per channel
7 Indication LED per channel
8 Module Dimensions Compact PCB with mounting holes

Usage

Getting Started

  1. Connect power — Supply 3.3V or 5V DC to the VCC pin and GND to ground.

  2. Connect outputs — Connect the three output pins (OUT1–OUT3) to digital input pins on your microcontroller:

    • Arduino: D2, D3, D4

    • ESP32: Any available GPIO pins

  3. Mount the module — Position the module 5–15mm above the surface, with the sensors facing down. Ensure the center sensor aligns with the line for optimal tracking.

  4. Adjust sensitivity — Place the module over a white area (or the background surface) and adjust each potentiometer until the corresponding LED just turns off. Then place it over the black line and verify the LED turns on.

  5. Upload and test — Write a simple sketch to read the three outputs and verify detection. Use the sensor states to control motor direction for line following.

Output Logic

Surface Reflected IR Output State (Typical)
White (background) Strong reflection LOW (0V)
Black (line) Weak reflection HIGH (VCC)

(Note: Output logic may vary by module variant — verify with your specific module.)

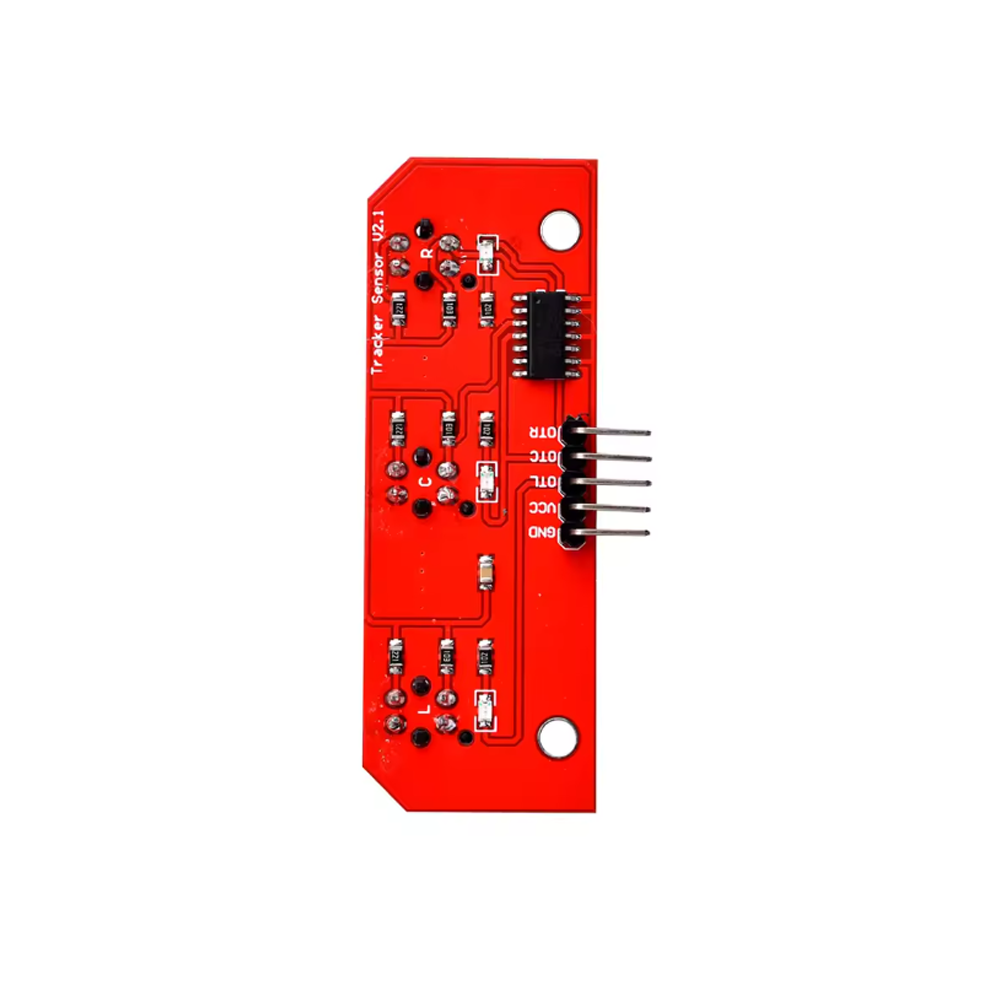
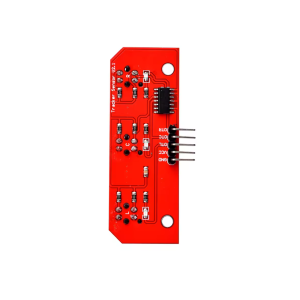
Pin Connections

Module Pin Function
VCC Power (3.3V–5V)
GND Ground
OUT1 Left sensor digital output
OUT2 Center sensor digital output
OUT3 Right sensor digital output

Example Arduino Code

cpp
#define LEFT_SENSOR 2
#define CENTER_SENSOR 3
#define RIGHT_SENSOR 4

void setup() {
  Serial.begin(9600);
  pinMode(LEFT_SENSOR, INPUT);
  pinMode(CENTER_SENSOR, INPUT);
  pinMode(RIGHT_SENSOR, INPUT);
}

void loop() {
  int left = digitalRead(LEFT_SENSOR);
  int center = digitalRead(CENTER_SENSOR);
  int right = digitalRead(RIGHT_SENSOR);

  Serial.print("L: "); Serial.print(left);
  Serial.print(" C: "); Serial.print(center);
  Serial.print(" R: "); Serial.println(right);

  // Basic line following logic
  if (center == HIGH && left == LOW && right == LOW) {
    // Move forward
  } else if (left == HIGH) {
    // Turn left
  } else if (right == HIGH) {
    // Turn right
  }

  delay(50);
}

Typical Applications

  • Line-following robots — Detect and follow a black line on a white surface

  • Maze-solving robots — Navigate complex paths using line detection

  • Automated guided vehicles (AGVs) — Follow guide paths in industrial settings

  • Edge detection — Detect the edge of a surface or material

  • Educational STEM projects — Teaching sensor principles and robotics

  • DIY robotics kits — Ready-to-use sensor module for hobby projects

Notes for Business Buyers

  • Ready-to-use design — Three-channel sensor array with simple digital outputs.

  • Adjustable sensitivity — Potentiometers allow adaptation to different surfaces and lighting conditions.

  • Simple interface — Three digital outputs for easy integration with any microcontroller.

  • Suitable for bulk purchasing — Ideal for robotics kit manufacturers, educational institutions, and product development.

Q: What is the Automatic Line Following Module (3 Channels) used for?

It is a line-following sensor array for robotics, used in line-following robots, AGVs, edge detection, and educational STEM projects.

Q: How many sensor channels does the module have?

It has three independent infrared reflective sensor channels — left, center, and right.

Q: What voltage does the module require?

It operates from 3.3V to 5V DC, making it compatible with Arduino, ESP32, STM32, and Raspberry Pi.

Q: How do I adjust the sensitivity?

Each channel has an onboard potentiometer. Place the module over the background surface and adjust until the LED just turns off, then verify detection over the line.

Q: What is the recommended mounting height?

Mount the module 5–15mm above the surface for optimal detection. Higher mounting may reduce detection reliability.

Q: What is the output logic?

Typically, the output is LOW over white surfaces (strong reflection) and HIGH over black lines (weak reflection). Verify with your specific module.

Q: Can I use this module outdoors?

Not recommended. Ambient infrared from sunlight can interfere with detection. Use in controlled lighting conditions for best results.

Q: Is the module waterproof?

No. The module is not waterproof and should be kept dry.

Q: How do I connect the module to an Arduino?

Connect VCC to 5V, GND to GND, and OUT1–OUT3 to digital pins D2–D4. Use digitalRead() to read each sensor.

Q: Can I purchase in bulk for a product development project?

Yes. This module is suitable for both individual users and business purchasing, including robotics kit manufacturers, educational institutions, and product development.